Flags SDK with Hypertune and Next.js

An e-commerce example built with Hypertune and Flags SDK that works well with Vercel Marketplace
boilerplate.detail.metadata.lastUpdated
il y a 2 mois
boilerplate.detail.metadata.author
Renaudboilerplate.detail.metadata.price
boilerplate.detail.metadata.free
npx boilerapp flags-sdk-hypertune-nextjs文档
Flags SDK Template
This example uses a template adapter for feature flags with the Flags SDK that works with the Flags Explorer.
Demo
https://flags-sdk-hypertune.vercel.app/
How it works
This demo shows different combinations of two banners on the home page. The banners are configured to show/hide each banner 50% of the time.
Once you visit the page, you can see a variation of both/one/none of the banners. Since this example is using a stable id to identify users, you will see the same variation until you reset your id.
To test different variations, you can use the Dev Tools at the bottom to reset the stable id and reload the page. This allows you to test different variations of the banners.
If you clone the example, you can also use the Flags Explorer to test different variations by creating overrides.
Deploy this template
Step 1: Link the project
In order to use the Flags Explorer, you need to link the project on your local machine.
vercel link
Select the project from the list you just deployed.
Step 2: Pull all environment variables
This allows the Flags SDK and the Flags Explorer to work correctly, by getting additional metadata.
vercel env pull
Step 3: Set up Hypertune
Use the Schema for this example
In the Hypertune dashboard, try this example by pasting the following schema into the Schema tab:
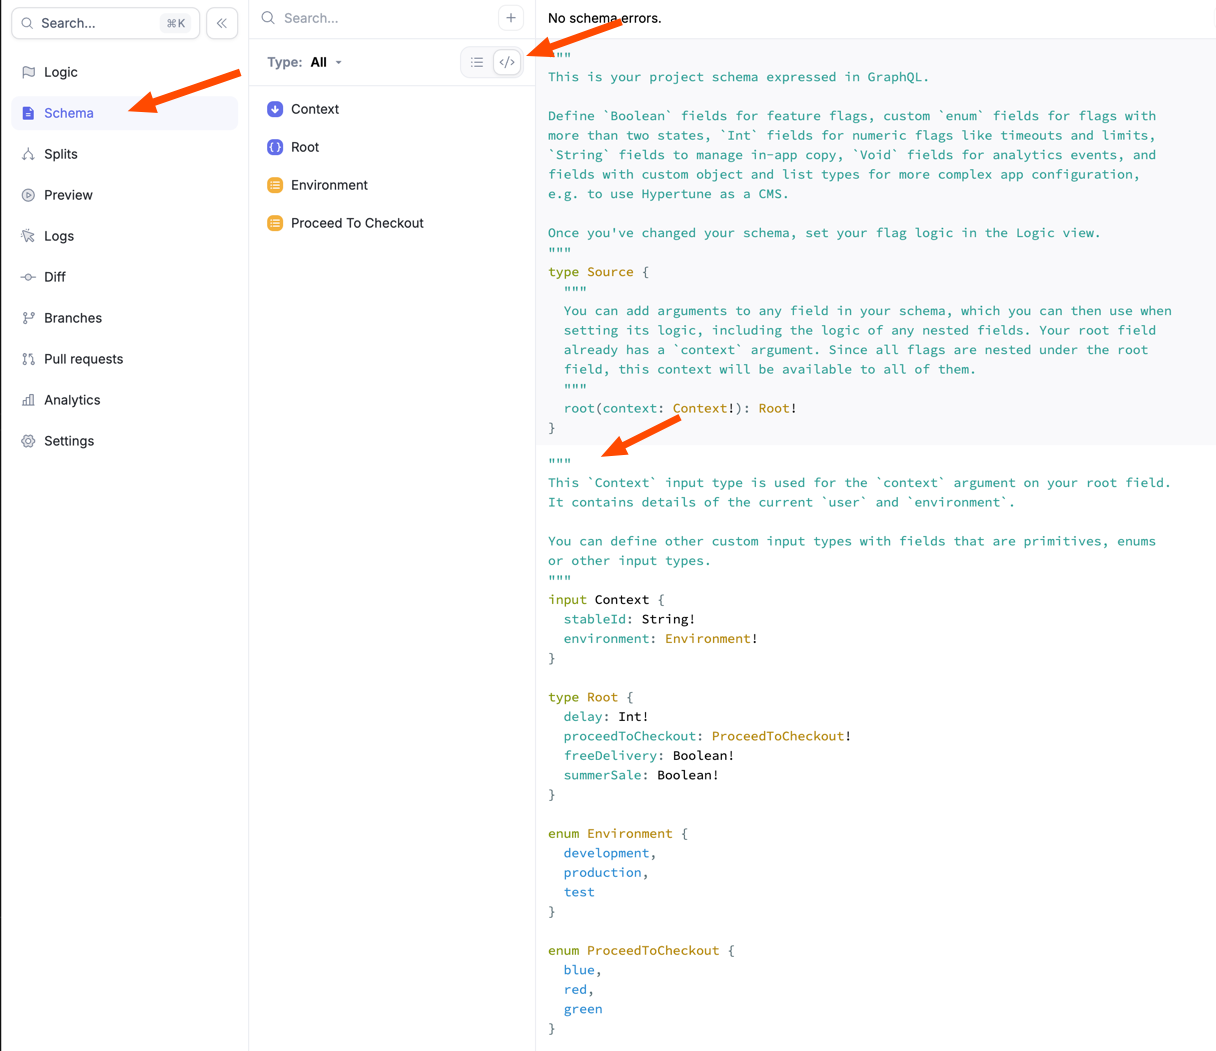
"""
This `Context` input type is used for the `context` argument on your root field.
It contains details of the current `user` and `environment`.

You can define other custom input types with fields that are primitives, enums
or other input types.
"""
input Context {
  stableId: String!
  environment: Environment!
}

type Root {
  delay: Int!
  proceedToCheckout: ProceedToCheckout!
  freeDelivery: Boolean!
  summerSale: Boolean!
}

enum Environment {
  development
  production
  test
}

enum ProceedToCheckout {
  blue
  red
  green
}
Use the Logic for this example
You will also need to create the logic for the flags to enable the flags to return different variants.
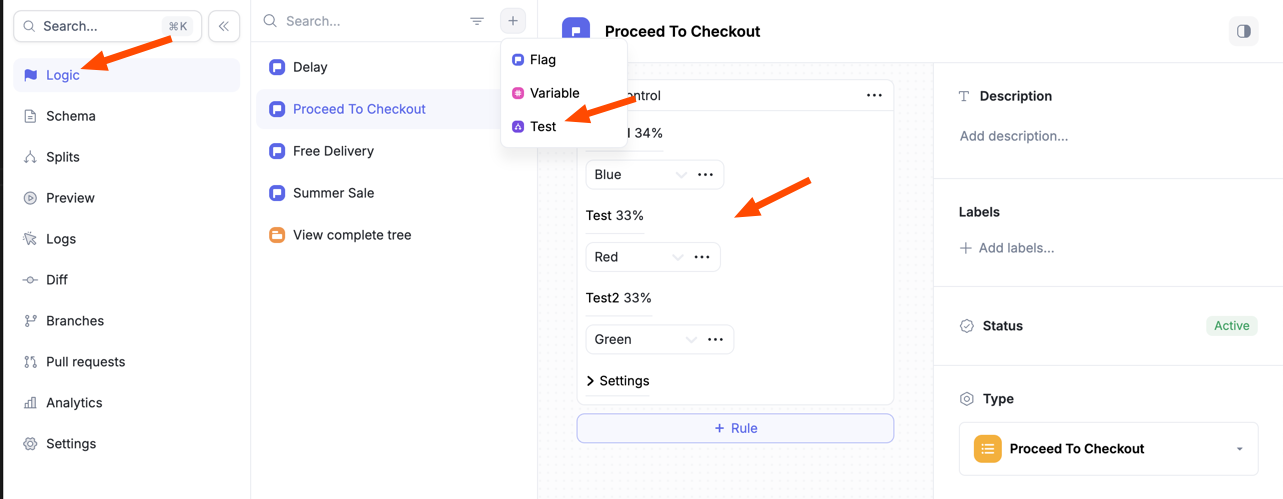
Create a Flag for the delay flag, and set the Type to Number.
Create a Test for each flag that splits traffic between users, and select the appropriate type for each flag.
Flags should be called delay, proceedToCheckout, freeDelivery, and summerSale as seen in flags.ts